Rank Transformation:
- Active and connected transformation
The Rank transformation allows us to select only the top or bottom rank of data. It Allows us to select a group of top or bottom values, not just one value.
During the session, the PowerCenter Server caches input data until it can perform The rank calculations.
Rank Transformation Properties:
- Cache Directory where cache will be made.
- Top/Bottom Rank as per need
- Number of Ranks Ex: 1, 2 or any number
- Case Sensitive Comparison can be checked if needed
- Rank Data Cache Size can be set
- Rank Index Cache Size can be set
Ports in a Rank Transformation:
Ports
|
Number Required
|
Description
|
I
|
1 Minimum
|
Port to receive data from another transformation.
|
O
|
1 Minimum
|
Port we want to pass to other transformation.
|
V
|
not needed
|
can use to store values or calculations to use in an expression.
|
R
|
Only 1
|
Rank port. Rank is calculated according to it. The Rank port is an input/output port. We must link the Rank port to another transformation. Example: Total Salary
|
Rank Index:
The Designer automatically creates a RANKINDEX port for each Rank transformation. The Power Center Server uses the Rank Index port to store the ranking position for Each row in a group.
For example, if we create a Rank transformation that ranks the top five salary’s employees, the rank index numbers the employees from 1 to 5.
- The RANKINDEX is an output port only.
- We can pass the rank index to another transformation in the mapping or directly to a target.
- We cannot delete or edit it.
Defining Groups:
Rank transformation allows us to group information. For example: If we want to select the top 3 salary’s employees of each Department, we can define a group for Department.
- By defining groups, we create one set of ranked rows for each group.
- We define a group in Ports tab. Click the Group By for needed port.
- We cannot Group By on port which is also Rank Port.
1) Example: Finding Top 5 Salary Employees
- EMP will be source table.
- Create a target table EMP_RANK_EXAMPLE in target designer. Structure should be same as EMP table. Just add one more port Rank_Index to store RANK INDEX.
- Create the shortcuts in your folder.
Creating Mapping:
- Open folder where we want to create the mapping.
- Click Tools -> Mapping Designer.
- Click Mapping-> Create-> Give mapping name. Ex: m_rank_example
- Drag EMP from source in mapping.
- Create an EXPRESSION transformation to calculate TOTAL_SAL.
- Click Transformation -> Create -> Select RANK from list. Give name and click Create. Now click done.
- Pass ports from Expression to Rank Transformation.
- Edit Rank Transformation. Go to Ports Tab
- Select TOTAL_SAL as rank port. Check R type in front of TOTAL_SAL.
- Click Properties Tab and Select Properties as needed.
- Top in Top/Bottom and Number of Ranks as 5.
- Click Apply -> Ok.
- Drag target table now.
- Connect the output ports from Rank to target table.
- Click Mapping -> Validate
- Repository -> Save
- Create Session and Workflow as described earlier. Run the Workflow and see the data in target table.
- Make sure to give connection information for all tables.
2) Example: Finding Top 2 Salary Employees for every DEPARTMENT
- Open the mapping made above. Edit Rank Transformation.
- Go to Ports Tab. Select Group By for DEPTNO.
- Go to Properties tab. Set Number of Ranks as 2.
- Click Apply -> Ok.
- Mapping -> Validate and Repository Save.
Refresh the session by double clicking. Save the changed and run workflow to see the new result.
RANK CACHE:
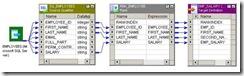
Sample Rank Mapping
When the Power Center Server runs a session with a Rank transformation, it compares an input row with rows in the data cache. If the input row out-ranks a Stored row, the Power Center Server replaces the stored row with the input row.
Example: Power Center caches the first 5 rows if we are finding top 5 salary Employees. When 6th row is read, it compares it with 5 rows in cache and places it in Cache is needed.
1) RANK INDEX CACHE:
The index cache holds group information from the group by ports. If we are Using Group By on DEPTNO, then this cache stores values 10, 20, 30 etc.
- All Group By Columns are in RANK INDEX CACHE. Ex. DEPTNO
2) RANK DATA CACHE:
It holds row data until the Power Center Server completes the ranking and is Generally larger than the index cache. To reduce the data cache size, connect only the necessary input/output ports to subsequent transformations.
- All Variable ports if there, Rank Port, All ports going out from RANK Transformations are stored in RANK DATA CACHE.
- Example: All ports except DEPTNO In our mapping example.
Questions:
1. What is rank transformation?
A rank transformation is used to select top or bottom rank of data. This means, it selects the largest or smallest numeric value in a port or group. Rank transformation also selects the strings at the top or bottom of a session sort order. Rank transformation is an active transformation.
2. What is rank cache?
The integration service compares input rows in the data cache, if the input row out-ranks a cached row, the integration service replaces the cached row with the input row. If you configure the rank transformation to rank across multiple groups, the integration service ranks incrementally for each group it finds. The integration service stores group information in index cache and row data in data cache.
3. What is RANKINDEX port?
A rank transformation is used to select top or bottom rank of data. This means, it selects the largest or smallest numeric value in a port or group. Rank transformation also selects the strings at the top or bottom of a session sort order. Rank transformation is an active transformation.
2. What is rank cache?
The integration service compares input rows in the data cache, if the input row out-ranks a cached row, the integration service replaces the cached row with the input row. If you configure the rank transformation to rank across multiple groups, the integration service ranks incrementally for each group it finds. The integration service stores group information in index cache and row data in data cache.
3. What is RANKINDEX port?
The designer creates RANKINDEX port for each rank transformation. The integration service uses the rank index port to store the ranking position for each row in a group.
4. How do you specify the number of rows you want to rank in a rank transformation?
In the rank transformation properties, there is an option 'Number of Ranks' for specifying the number of rows you wants to rank.
5. How to select either top or bottom ranking for a column?
In the rank transformation properties, there is an option 'Top/Bottom' for selecting the top or bottom ranking for a column.
6. Can we specify ranking on more than one port?
No. We can specify to rank the data based on only one port. In the ports tab, you have to check the R option for designating the port as a rank port and this option can be checked only on one port.
4. How do you specify the number of rows you want to rank in a rank transformation?
In the rank transformation properties, there is an option 'Number of Ranks' for specifying the number of rows you wants to rank.
5. How to select either top or bottom ranking for a column?
In the rank transformation properties, there is an option 'Top/Bottom' for selecting the top or bottom ranking for a column.
6. Can we specify ranking on more than one port?
No. We can specify to rank the data based on only one port. In the ports tab, you have to check the R option for designating the port as a rank port and this option can be checked only on one port.
7. Difference between Sorter and Rank transformation in Informatica?
Sorter
|
Rank
|
Sorter is used to Sort the data either ASC or DSC.
|
Rank is used to arrange data from top or bottom Group by can be done using Rank.
|
Sorter can be used to remove duplicates(Use Distinct ouptut)
|
Using Rank we cannot remove duplicates.
|
In sorter we cannot assign values to the ports
|
In rank we can assign variables and write non-aggregate expressions also.
|
In sorter the Integration Service uses Sorter Cache to perform the sort operation.
|
In Rank the Integration Service stores group information in an index cache and row data in a data cache.
|